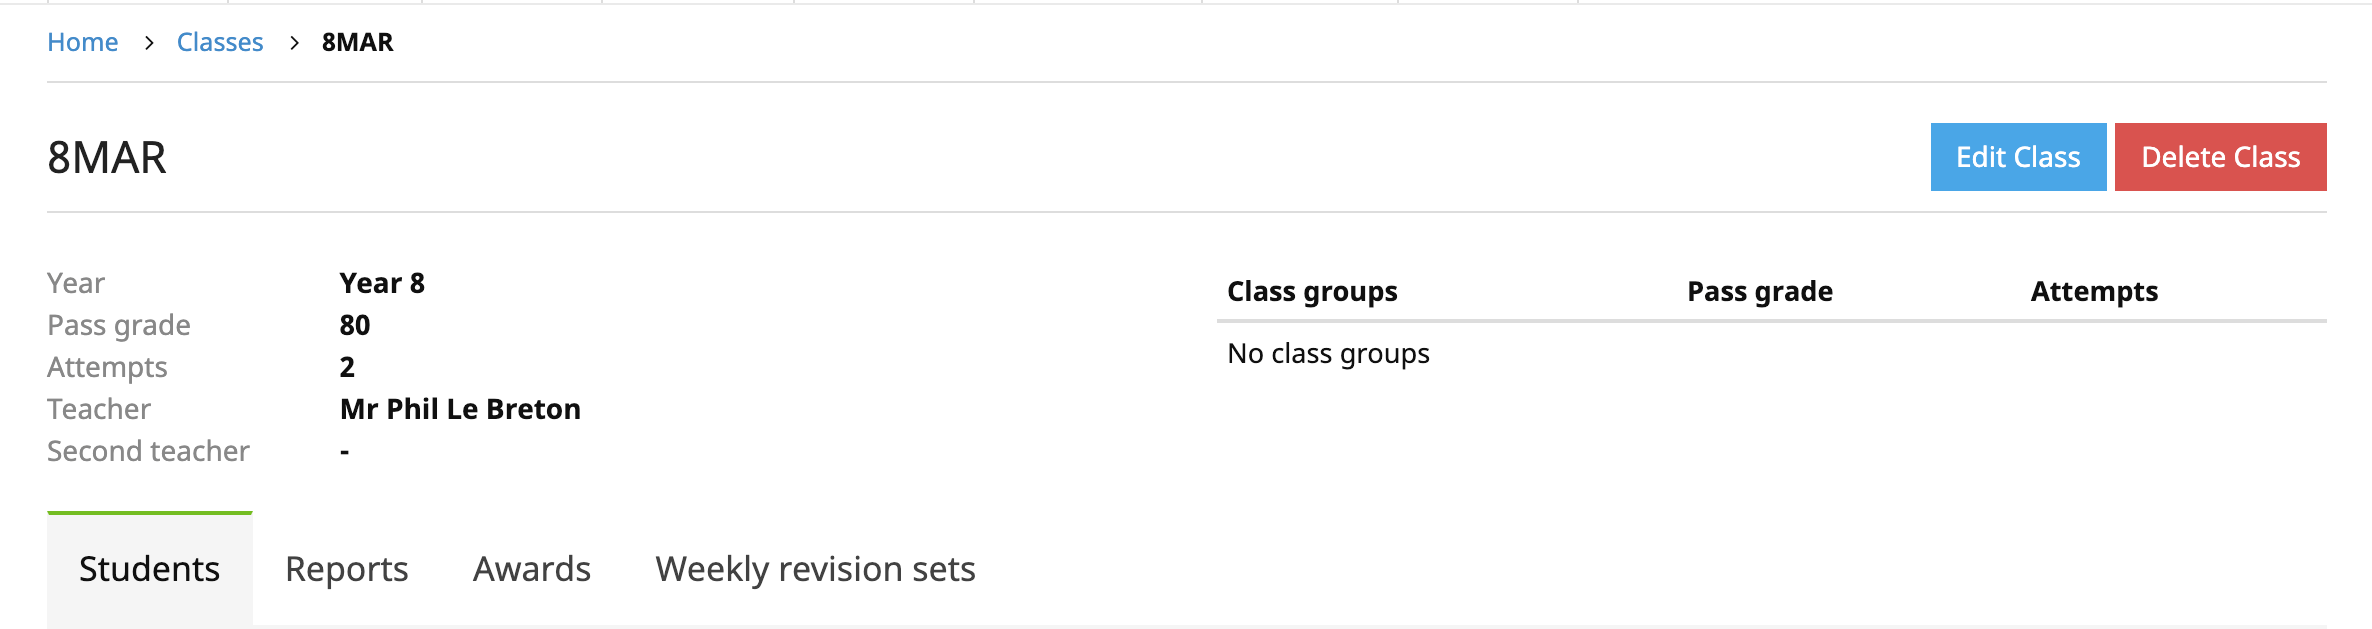
To administer one of your own students, from the Teacher Admin home page select "Manage My Classes". Select from the list of classes and click the Edit icon on the toolbar.
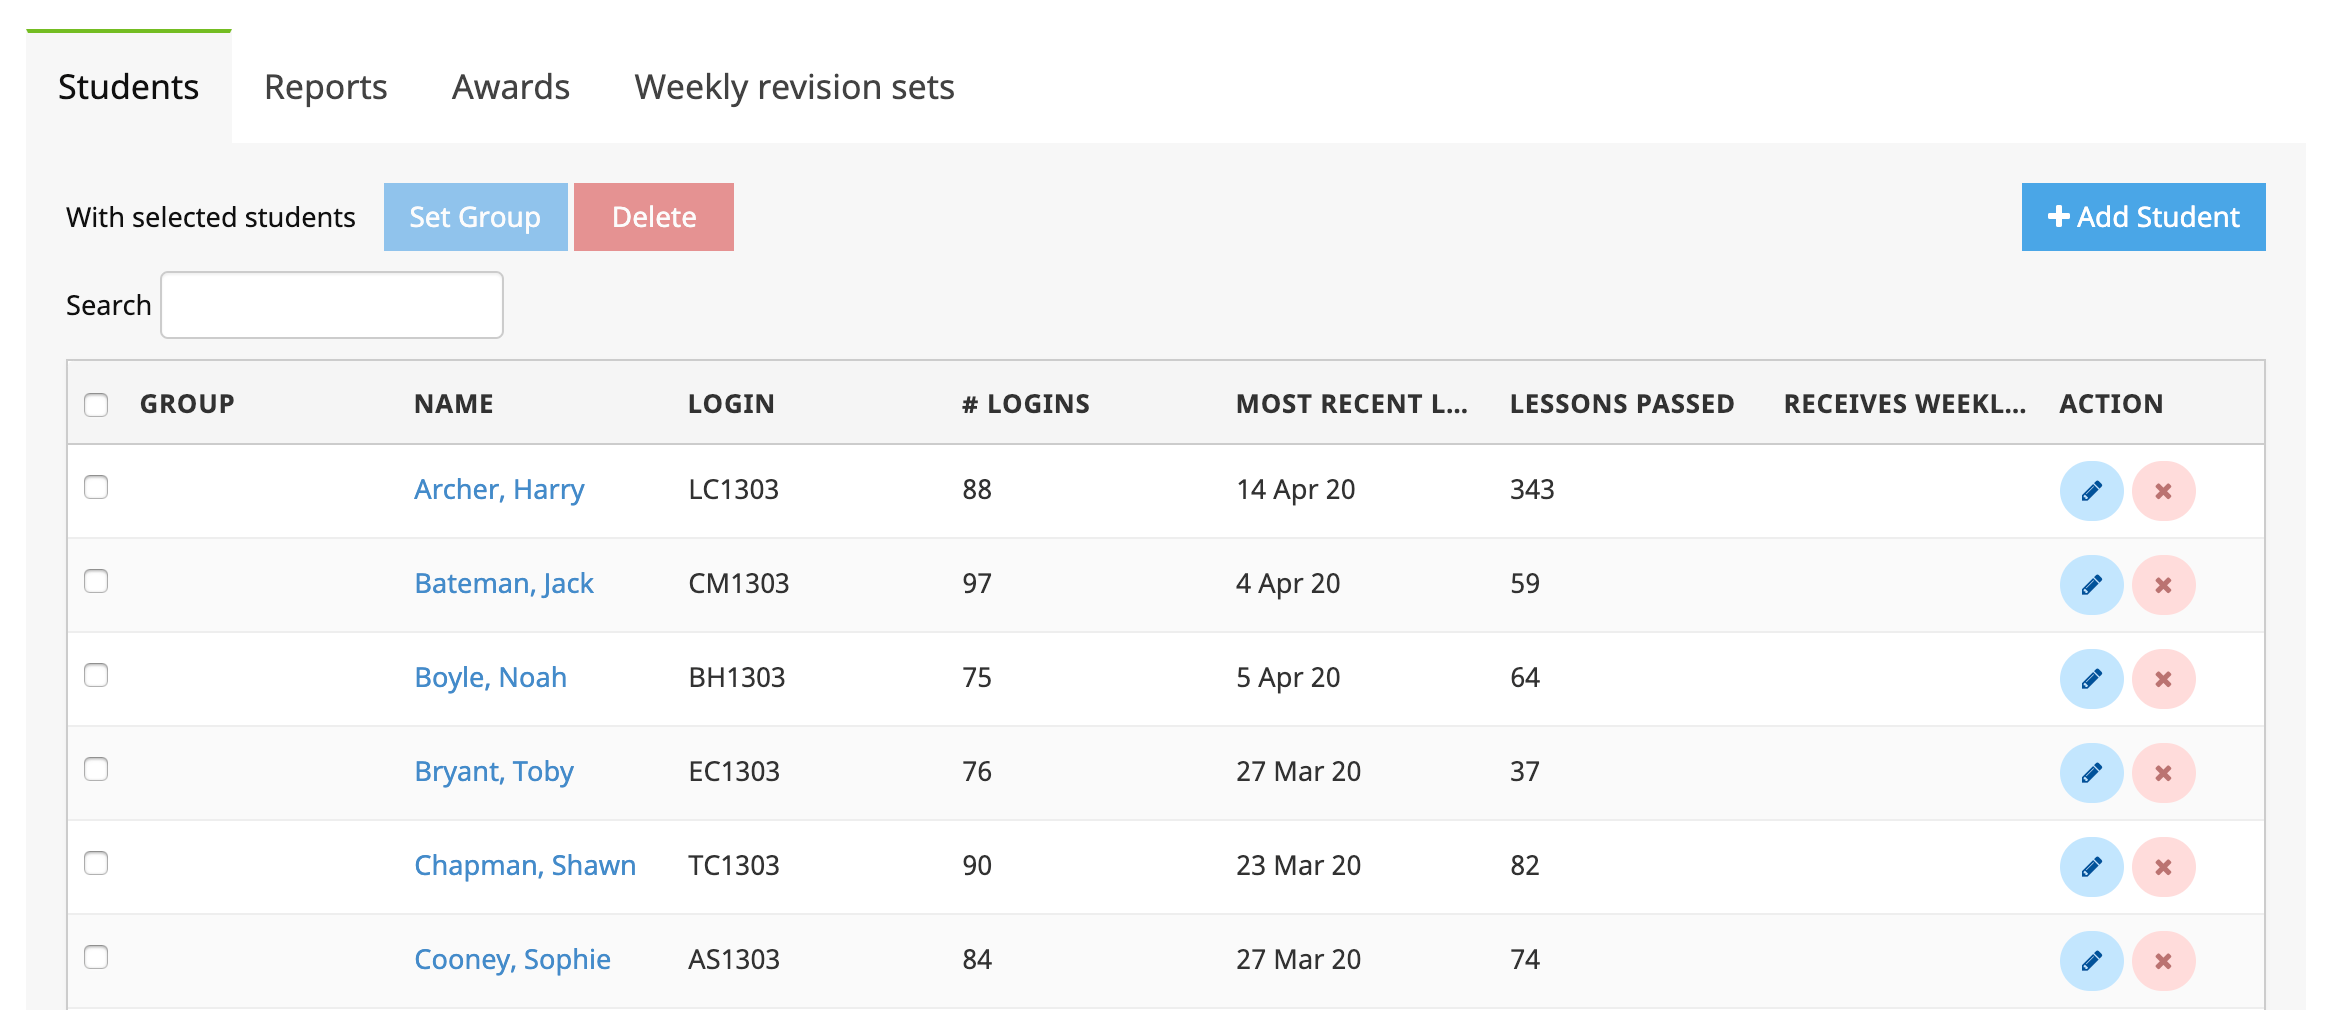
Select the Students tab to view the list of students in the class.
Full administrators have the option from the Teacher Admin home page of selecting "All Students", giving them access to administer any student in the school.
To add a new student , select the Add Student icon on the toolbar and fill out the form that appears. Press Save when you have finished. The new student is immediately added to the student list.

If a student belongs to more than one class, use the option on the form "+ Add to second class". The student will then appear in both class rolls, and receive tasks set for both classes.
To modify an existing student , select the student and press the Edit icon on the toolbar. Edit the record to suit and press Save.
To delete a student , select the student and press the Delete icon on the toolbar. Press OK on the confirmation box, and the student will be removed from the school roll.
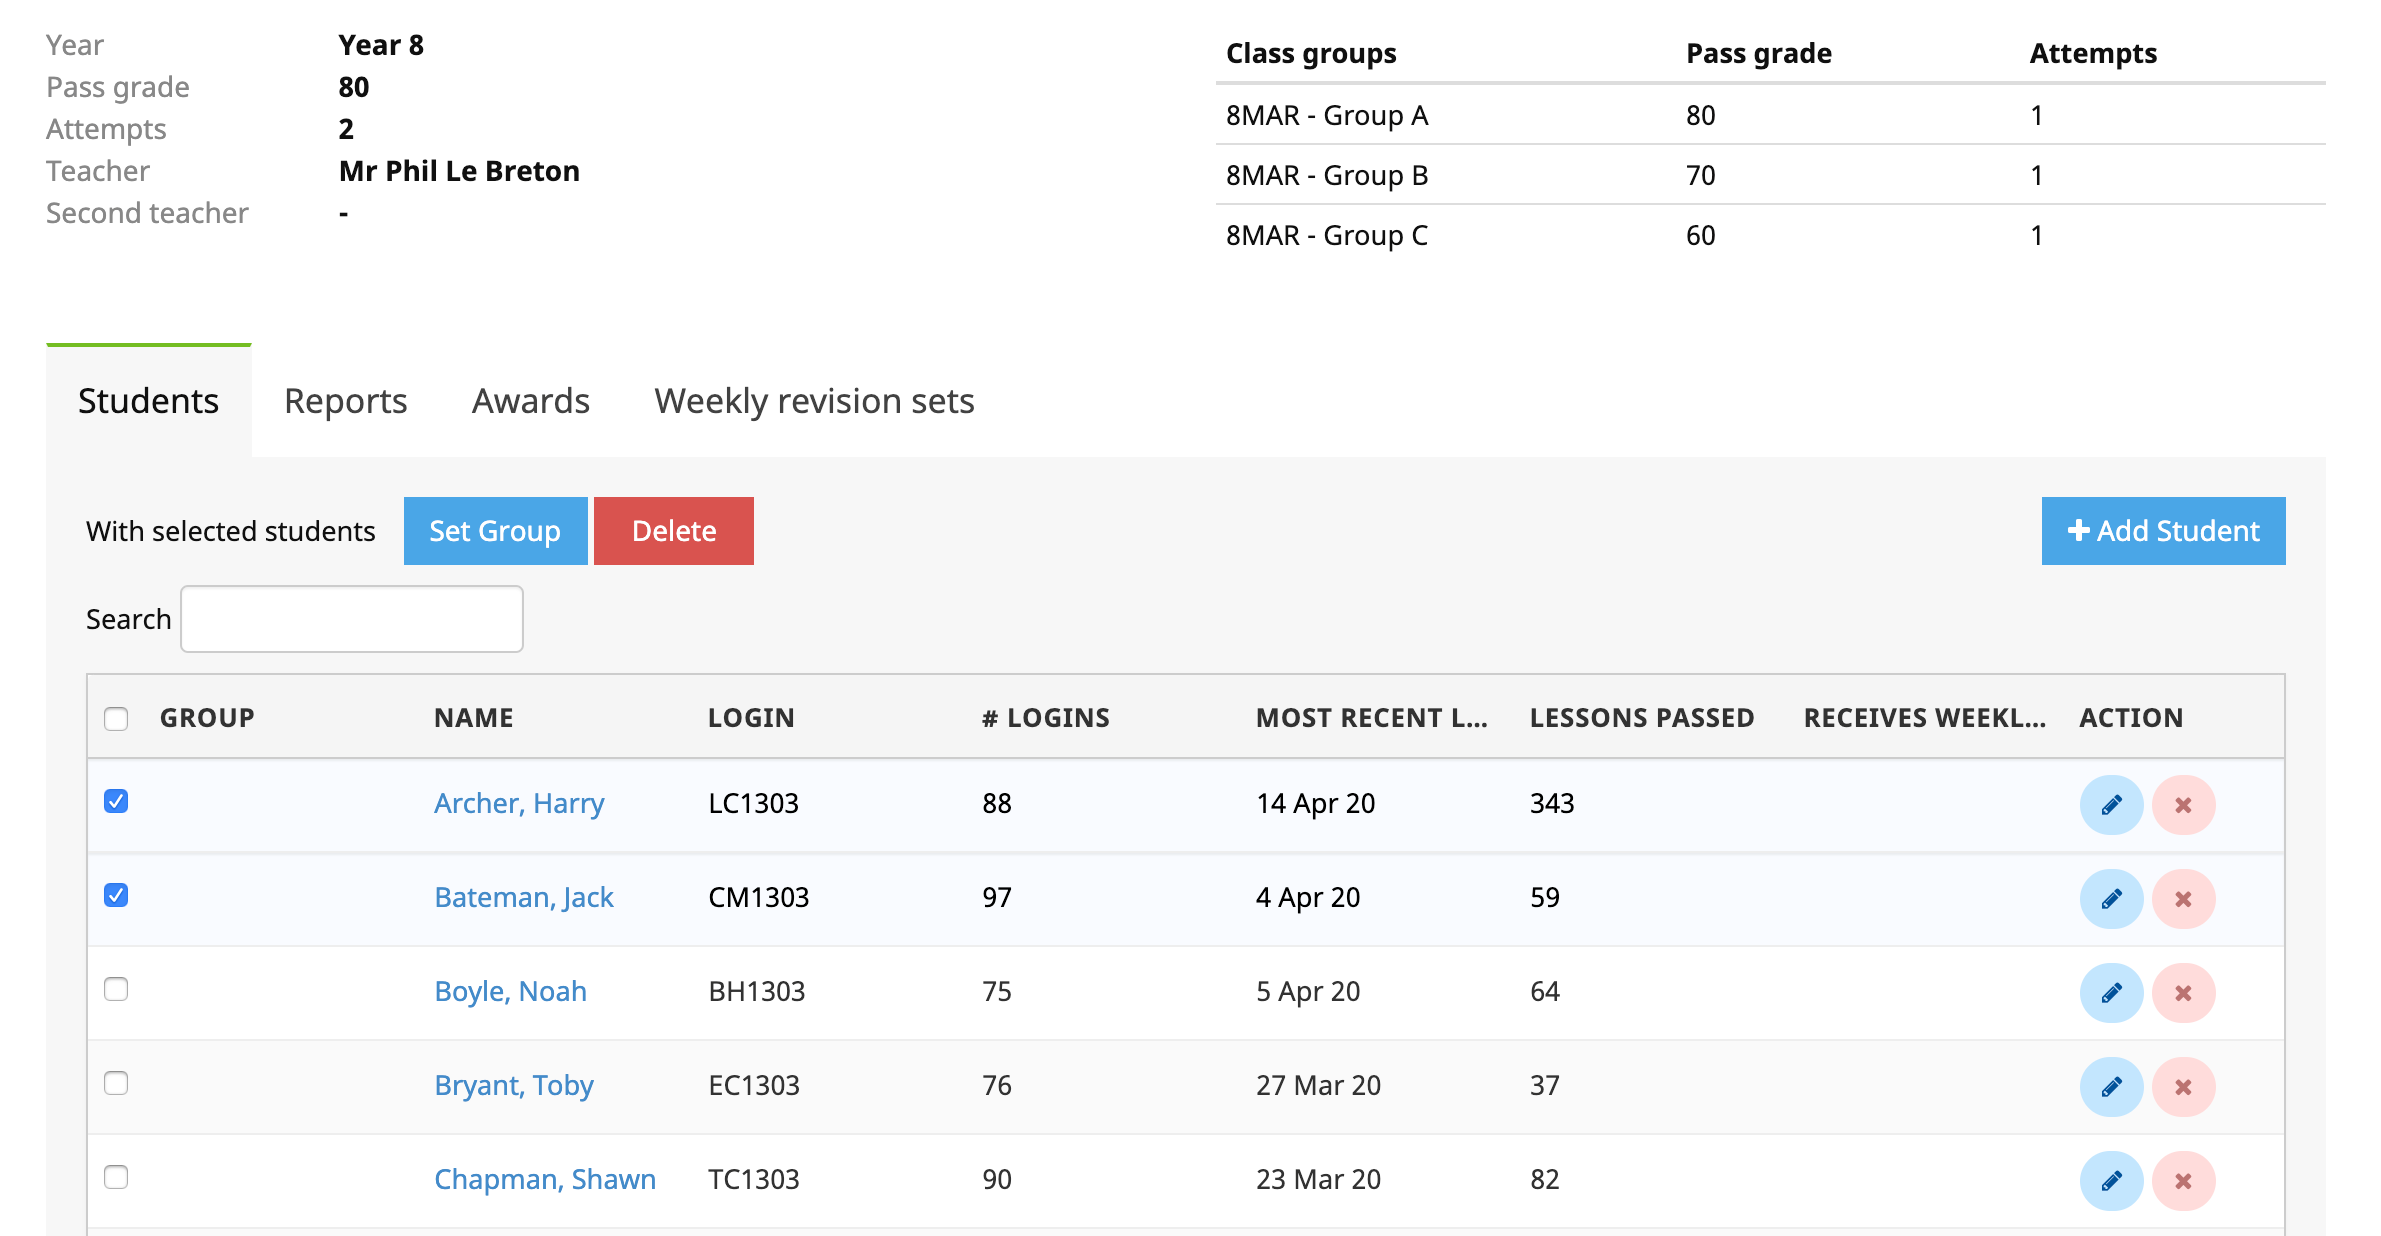
When setting up a class, there is the option to create groups within the class. Instructions on creating class groups can be found here . In this section we show how to place students into groups. The instructions that follow assume that at least one group has been created.
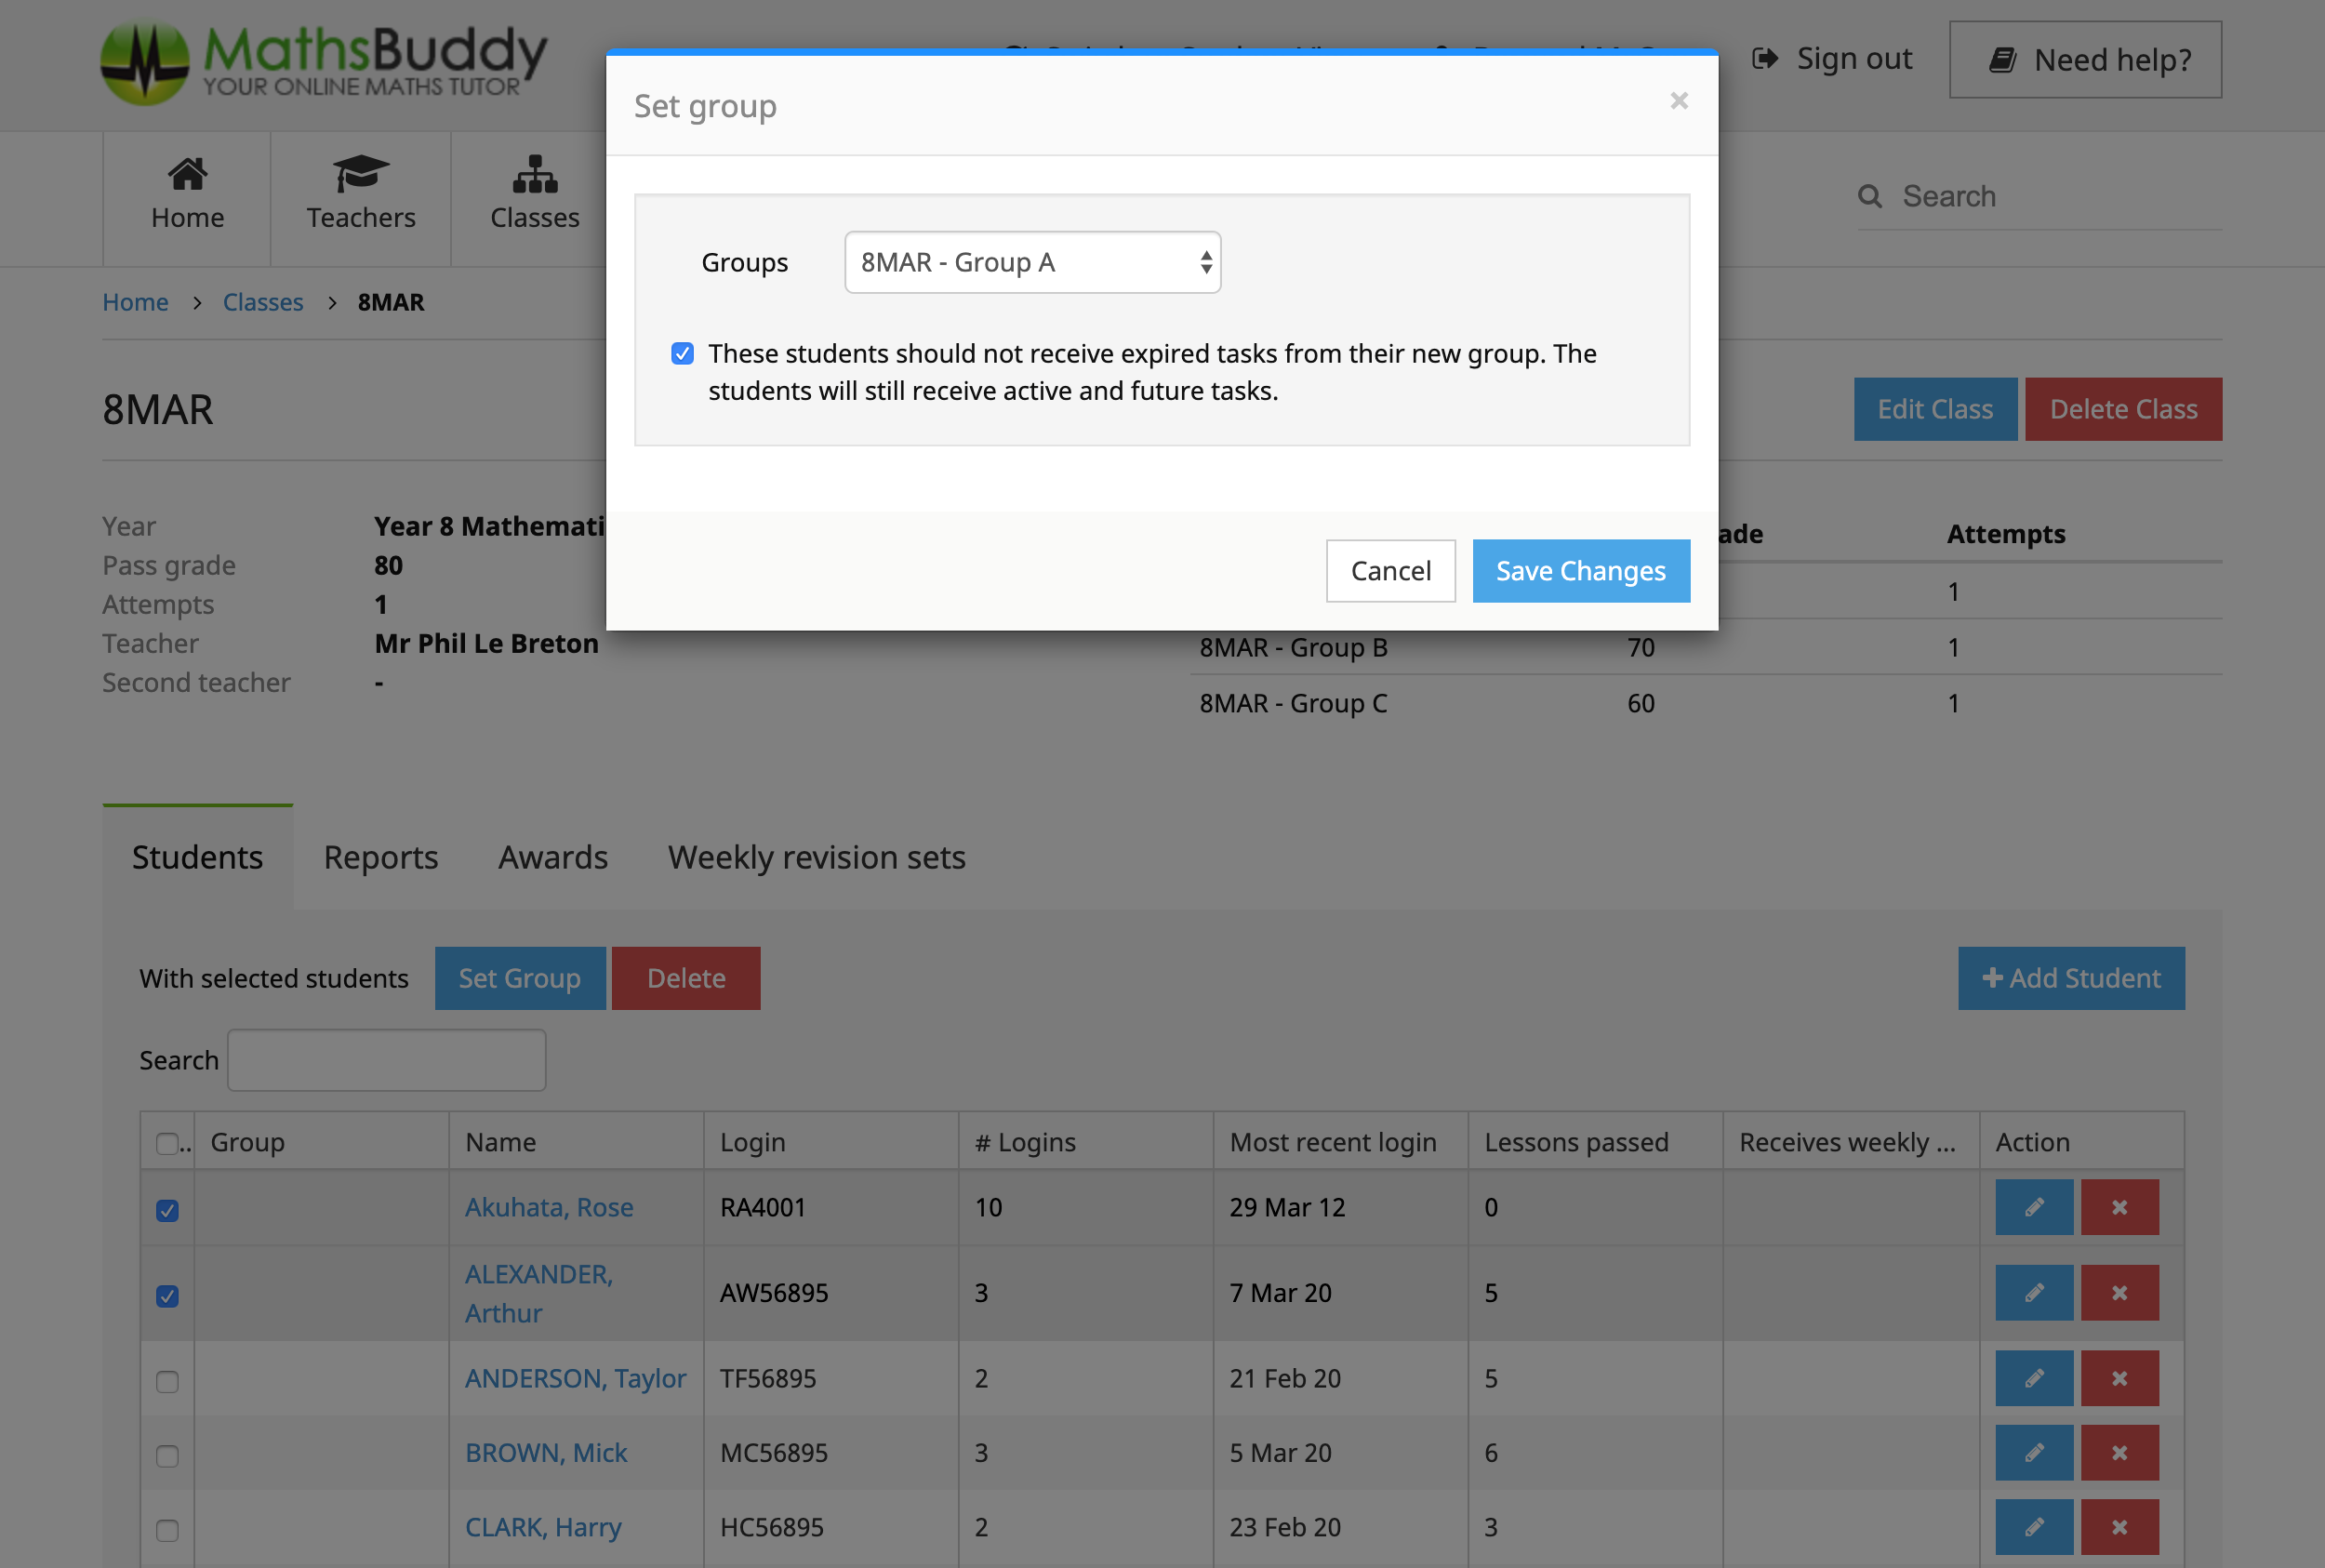
To place the students into groups, select the students and then press "Set Group".
The Set group popup appears. Select the required group and uncheck the box if you would like the students to receive expired tasks from their new group. Press "Save Changes" when finished.
The student table will update showing the new group assignments.
